

Capturing 802.11 Frames Using Ruckus Wireless Access Points and Wireshark
Its finally here, my first blog post 🙂. Special thx to Keith Parsons, Ferney Munoz and Tom Carpenter for inspiring me to start blogging. Lets kick-off with something not to hard that I field tested some time ago, nevertheless very useful for WLAN engineers troubleshooting Ruckus WLANs.
Very special thanks to Primož Marinšek who’s blog inspired me to write my own about this topic. His post describes the steps to be taken for older Ruckus access points only, so I thought, lets update these steps for more recent AP models 🙂. His blog can be found here: http://wlanimp.blogspot.com/2014/04/capturing-80211-frames-with-ruckus.html
First of all, some notes to take into consideration:
Note 1*: I ve tested this on Wireshark versions 2.0.2 and 2.2.2 and it will probably work on later versions as well.
Note 2*: I ve only tested it on Wireshark running on Windows OS.
Note 3*: You can only capture on 1 interface at a time (2.4 or 5GHz) and an SSID needs to be configured for capturing to work.
Note 4*: Works for any Ruckus AP supporting packet capturing, I ve used an R510 for my demonstration.
Note 5*: Works for APs in standalone mode, ZoneDirector and SCG/SmartZone controlled mode.
The first thing you should do is put your APs radio into monitor mode or as Ruckus calls it "capture" mode, You can accomplish this in 2 ways:
- SSH to an AP and enable it there.
- If the AP is ZD controlled you can enable it via the ZDs' web GUI (Via the ZD you can probably set it up faster, but you can't set all of the available options (switches) that way. >> More on that topic later.
The second thing is setting up Wireshark to receive the 802.11 frames from the capturing APs' radio.
The following guided steps will demonstrate how to set-up the AP using SSH only.
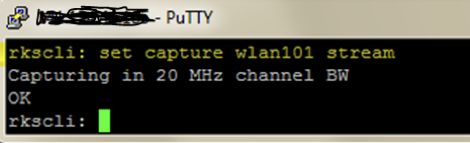
SSH to the AP and enable capture mode (I love using Putty for this).

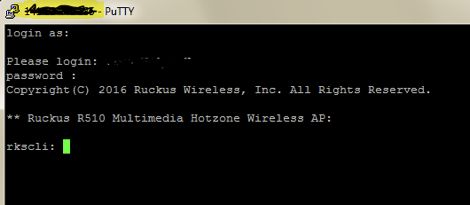
Once logged into the APs’ CLI, enable the capture mode for which you have 2 options:
- Stream mode: stream the frames directly to Wireshark.
- Save mode: you can save a certain amount of frames and transfer them using TFTP.
Since most all recent APs will have 2 radios (2.4 and 5GHz) you will need to specify which radio should be configured for capturing. Each radio has 1 monitor (MON) interface. You can get a list of interfaces that an AP supports using following command:
# get wlanlist >> newer AP's will not show these interfaces anymore, however, they are still there.
Output for Older Access Points >>
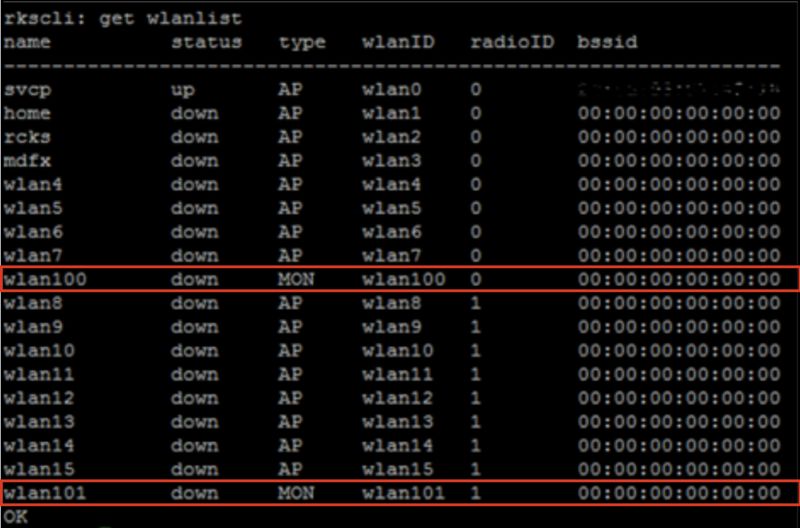
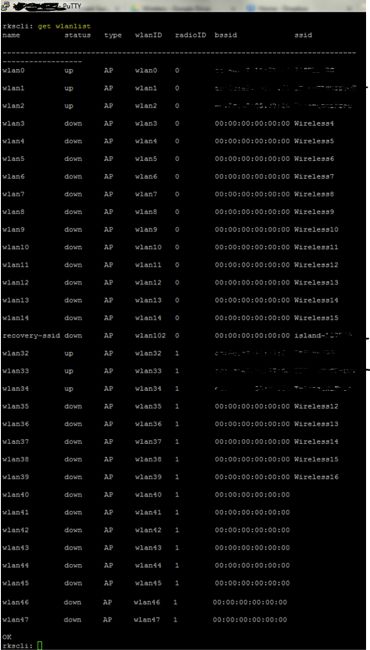
Output for Newer Access Points (no wlan100 nor wlan101 in the list here) >>
In short:
- wlan100 is located on the 2.4GHz radio
- wlan101 is located on the 5GHz radio
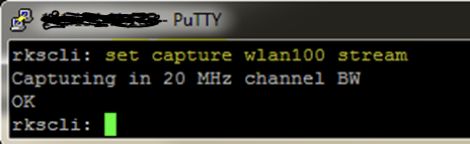
Below the command you should use to start a streaming capture on either interface:
# set capture wlan10x stream >> where x is either 0 or 1, depending on the radio you want to capture on.
You can also add following switches after the main command to set capture filters, the 2 most important are:
-> -nob: nobeacon
-> -noc: nocontrol
# set capture wlan10x stream -nob >> no captured beacons will be streamed to Wireshark.
# set capture wlan10x stream -noc >> no captured control frames will be streamed to Wireshark.
Note 6*: Be advised that you can always use display filters later on in Wireshark and so my advice is to capture everything.
Note 7*: These options won’t be available when using a ZoneDirector to set-up packet capturing on the AP(s).
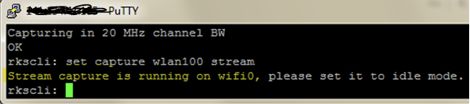
Command for 2.4GHz Radio Interface >>
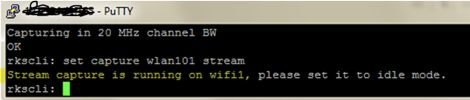
Command for 5GHz Radio Interface >>
We are done here for now, it’s time to set-up Wireshark.
- Click on the capture TAB and select Options.
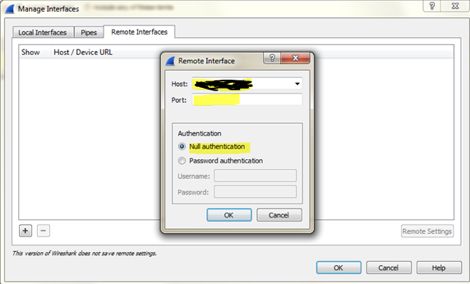
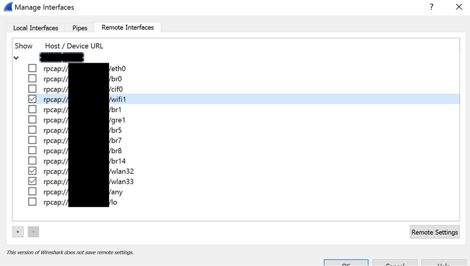
- Next, click on Manage interfaces and configure the Remote interfaces.
- Click the plus sign to add a remote interface. Input the APs IP address and just click the OK button. No need for authentication or port settings (default port of 2002 will be used).
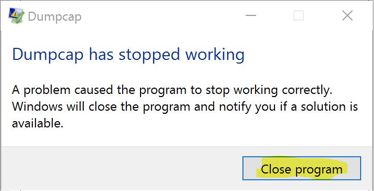
Note 8*: An error could be returned >> keep clicking away this error until the interfaces are reveiled !!!
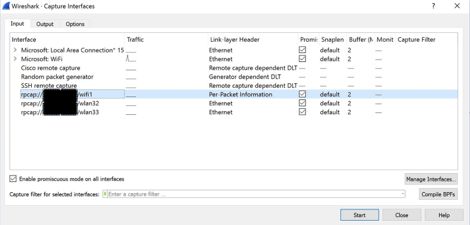
You will now see a list similar to the one below >>
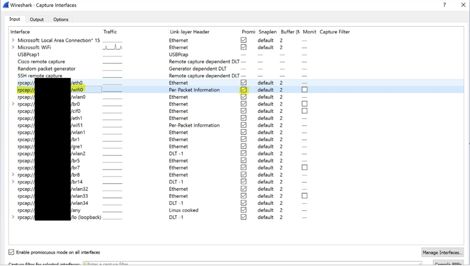
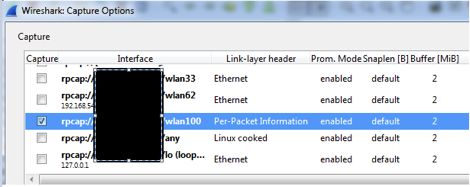
Now select all the check boxes on the right except the wifi0 or wifi1 as well as the interfaces of the configured SSIDs on the radio you like to capture on (I could not make the streaming work without also leaving these interfaces enabled), you can check the interface names needed using previous command:
# get wlanlist
Note 9*: wlan100/wlan101 >> newer AP's will not show these interfaces anymore, so to know what interface to capture on run the following command 2 times:
# set capture wlan100 stream
# set capture wlan101 stream
Older access points (no need for previous steps)>>
Note 10*: Checking the boxes will hide all the interfaces except the once not selected. leave following checkboxes enabled or the remote interface capture will not work.
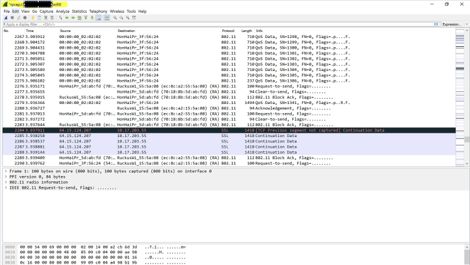
Now you should click the OK button to close the window and select wifi0 (wlan100) or wifi1 (wlan101) from the list, next click on the Start button to run the capture.
If everything went well, then you now should see packets in Wireshark 🙂.
Oh yes, and last but not least, how to stop the packet streaming from the APs? Simple, just run 1 of the following commands:
# set capture wlan100 idle
# set capture wlan100 idle
Thx for reading and hopefully we meet again here for my next post.
-THE END-
